


Install the editor with your favorite package manger:
npm install blocky-core
If you want to use the editor with React.js, install the blocky-react:
npm install blocky-react
The Editor is data-driven.
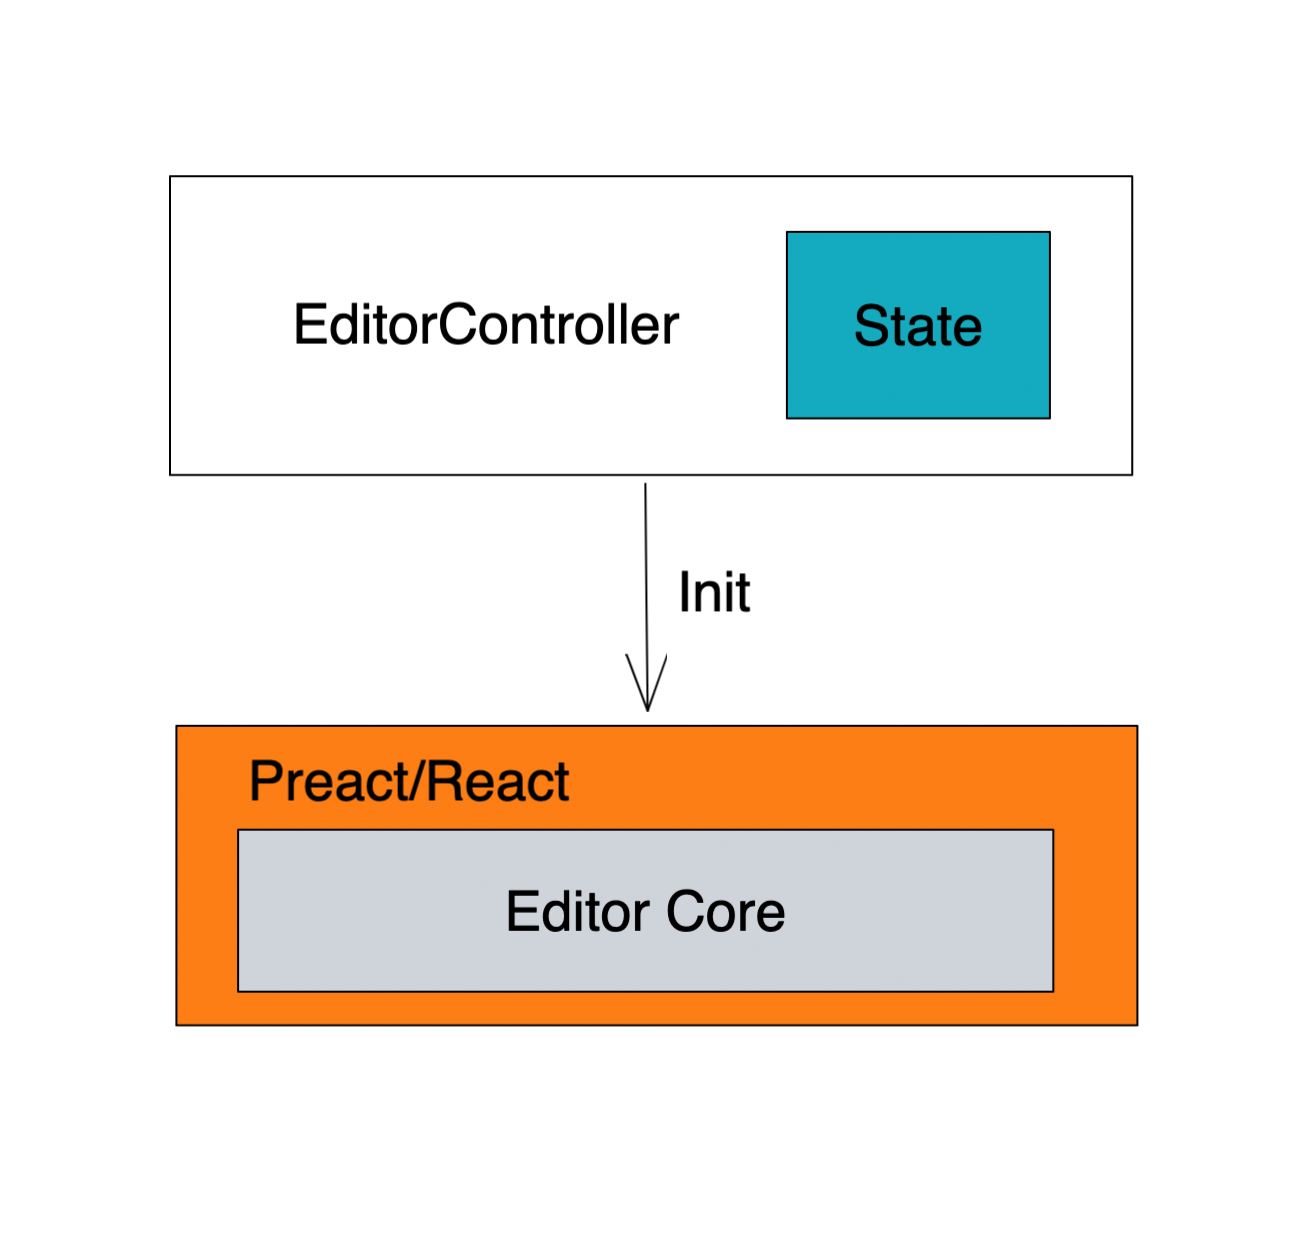
The EditorState includes all the states of the editor. The Editor will render depending on the EditorState.
The controller is a bridge between the UI and the states. It also provides API for data manipulations.
A controller is used to initialize and control the editor.
You can choose what plugins the editor should load.
You can define how the editor render the toolbar.
import { EditorController, SpannerPlugin } from "blocky-core";
import {
  makeReactSpanner,
  makeReactToolbar,
  makeDefaultReactSpanner,
  makeDefaultReactToolbar,
} from "blocky-react";
import ToolbarMenu from "./toolbarMenu";
import "blocky-core/css/blocky-core.css";

/**
 * The controller is used to control the editor.
 */
function makeController(): EditorController {
  return new EditorController({
    /**
     * Define the plugins to implement customize features.
     */
    plugins: [
      /**
       * Tell the editor how to render the spanner.
       * A spanner is a plugin that will follow the blocks.
       * We use a banner written in React here.
       */
      new SpannerPlugin({
        factory: makeDefaultReactSpanner(),
      }),
    ],
    /**
     * Tell the editor how to render the banner.
     * We use a toolbar written in React here.
     */
    toolbarFactory: makeDefaultReactToolbar(),
  });
}
Pass the editor to the component.
import {
  BlockyEditor,
  makeReactToolbar,
  useBlockyController,
} from "blocky-react";
import { EditorController } from "blocky-core";

function App() {
  const containerRef = useRef<HTMLDivElement>(null);

  const controller = useBlockyController(() => {
    return makeController("user", () => containerRef.current!);
  }, []);

  return (
    <div ref={containerRef} style={{ width: "100%", display: "flex" }}>
      <BlockyEditor controller={controller} autoFocus />
    </div>
  );
}
import { Editor } from "blocky-core";

const container = document.querySelector("#app");
const editor = Editor.fromController(container, controller);
editor.render();
The data model in Blocky Editor is represented as an JSON Document:
Example:
{
  "t": "document",
  "title": {
    "t": "title",
    "textContent": { "t": "rich-text", "ops": [] }
  },
  "body": {
    "t": "body",
    "children": [
      /** Content */
    ]
  }
}
You can use the plugin mechanism to extend the editor with your custom block.
We can define a block with VanillaJS. You can choose React, which is more easier.
import { type Editor, type IPlugin } from "blocky-core";
import { makeReactBlock, DefaultBlockOutline } from "blocky-preact";

export function makeMyBlockPlugin(): IPlugin {
  return {
    name: "plugin-name",
    blocks: [
      makeReactBlock({
        name: "BlockName",
        component: () => (
          <DefaultBlockOutline>Write the block in Preact</DefaultBlockOutline>
        ),
      }),
    ],
  };
}
To implement a block, you need to implement two interfaces.
Define the block
You should implement the interface IBlockDefinition.
import {
  type IBlockDefinition,
  type EditorController,
  type BlockData,
  type BlockCreatedEvent,
  Block,
} from "blocky-core";

class MyBlock extends Block {
  static Name = "MyBlock";
  static Editable = false;

  /**
   * Get the data of the block.
   */
  get elementData(): BlockyElement;

  /** The methods to implement **/
  /** render your dom when the block is mounted */
  blockDidMount(e: BlockDidMountEvent): void;

  /**
   * Handle the block is focused.
   *
   * This hook will only be triggered when the focused id is
   * equal to the block'id. The children is out of situation.
   *
   */
  blockFocused?(e: BlockFocusedEvent): void;

  /**
   * Triggered when the block is blur.
   */
  blockBlur?(e: BlockBlurEvent): void;

  /**
   * Triggered when the renderer re-render the block.
   */
  render?(container: HTMLElement): void;

  /**
   * Clean something when the block is unmounted.
   */
  dispose() {
    /** TODO: clean */
    super.dispose();
  }
}

export function makeMyBlockPlugin(): IPlugin {
  return {
    name: "plugin-name",
    blocks: [MyBlock],
  };
}
When we construct the EditorController, we can pass the plugin to it.
function makeController(): EditorController {
  return new EditorController({
    plugins: [
      /** ... */
      makeMyBlockPlugin(),
    ],
    /** ... */
  });
}
You can insert a block by using the Changeset API.
new Changeset(editorState)
  .insertChildrenAt(doc, index, [blk.element("BlockName)])
  .apply()
We also have hight-level API to insert a block.
editorController.insertBlockAfterId(textElement, id, {
  autoFocus: true,
});
When the data element is inserted, the editor will render the block.
Currently, the document tree of BlockyEditor supports collaborative editing using operation transforming(known as OT).
What you need is to transfer the changeset between users. The changeset can be applied repeatedly. But they must be applied in order.
To resolve conflicts, you need to transform the operations in the central server. The example server's code will be released later.
You can also use a CRDT library such as YJS and bind the data model to it.
Example:
this.editorControllerLeft.state.changesetApplied.on((changeset) => {
  // simulate the net work
  setTimeout(() => {
    this.editorControllerRight.state.apply({
      ...changeset,
      afterCursor: undefined,
      options: {
        ...changeset.options,
        updateView: true,
      },
    });
  });
});

this.editorControllerRight.state.changesetApplied.on((changeset) => {
  setTimeout(() => {
    this.editorControllerLeft.state.apply({
      ...changeset,
      afterCursor: undefined,
      options: {
        ...changeset.options,
        updateView: true,
      },
    });
  });
});